Saturday, April 16, 2011

Quick update

So, I had the bike completed for over 2 month now. I haven't had a chance to take it out for a proper ride yet apart from some quick ones around the Phoenix Park. This was mainly due to the fact that the handlebars were too big for me and that I wasn't confident enough to ride the bike without being able to use the brake comfortably and safely.
I ordered new handlebars and a stem from www.Allterraincycles.co.uk. These were the Bontrager SSR OS Stem and the Bontrager Race VR-S Road Bar. The stem was a short 60mm stem to accommodate me better on the frame and the handlebars were the short drop handlebars with a short reach (70mm) I found out about these from trying out the girlfriends new bike which was a Trek Lexa and it had the same handlebars on it. I fitted them last night on the bike along with a quill adapter which was bought from Joe Dalys Cycle in Dumdrum where David was extremely helpful in acquiring this item as it was a bit of an unusual size. Took the bike out for a quick spin today in Phoenix park again and it felt just right like Goldilocks would say. I am very pleased with the result and feel that the bike is finally the way I expected it to be.


Here is a quick picture of the new handlebars:


More updates to follow as I will be bringing the bicycle down to Cork this coming week and will need to find new routes over there. If anyone has any suggestions for Cork please let me know. Thanks :)

Friday, February 18, 2011

Finishing it all up

Today I went into the shop to put on more parts on the bike. I didn't know much about putting on the STI levers. cables, brakes etc and I was very lucky to have Gabriel and Gareth to help me out. I was being the little helper as I wouldn't have been able to do it all by myself now.
We had to cut the forks by a couple of centimeters and that took a couple of tries to get it right as me and Gabriel couldn't find the mark that was made on the metal. In the end we managed to get it right and the handlebars went in without too much trouble. Ok, maybe with a little bit of help from the hammer.

This was Gareth and Gabriel messing about while getting the parts on the bike.


Next went on the gear/brake levers on the handlebars along with the cables which needed some gentle cohersing especially the cables for the front mech. Gabriel found a way to make it work and we were in business.


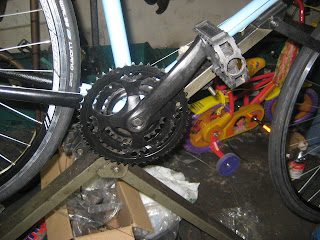
After that, the rear mech, rear hanger and crankset went in. I took off the chain protector off the outer chainring as it looked a bit silly. Those went up without any trouble onto the frame.


Sprocket, front and back wheels went on along with the chain and after some tweaking by Gabriel, the gear changes were as smooth as butter. The handle bartape went up easily and it looked the part. Also, the seat looked even better today.

And this is the final result with the finished bicycle. It looks pretty cool I think and tomorrow I will go have a cycle on it to test it all out and see how it handles and what needs to be tweaked as I know there will be some tiny adjustments that will be required.


But for tonight, it will hang by the ceiling in the shop till I get to see her tomorrow and go for a test ride.


Wednesday, February 16, 2011

Build it up

Today I started to put the parts on the bicycle after getting the frame unwrapped from the masking tape and paper. The frame and fork had been left the to cure over the last four days and the end result was very decent.


I was really happy how it all turned out and the orange and black bit on the horizontal tube looked pretty cool.
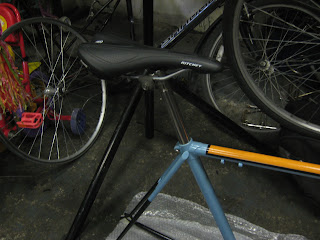
After getting the box of parts, Gabriele, Gareth and Anne helped me put on the headset onto the fork and frame. I then put on the seat, seat post, front brake calipers and rear brake calipers onto the frame. Getting the seat and seatpost was the most difficult task for me as the metal frame of the seat made it really tight to access. But I managed it in the end and I must say that seat looks gorgeous and looks more expensive that it really was. All the new parts that I bought were from Ribble Cycles (www.ribblecycles.co.uk), which had a 20% off offer a while ago and were very prompt in their delivery and charges. It took seven days to get to me but I didn't mind as their delivery charges were very reasonable and with the 20% off offer, suited my shoe string budget for this project.


This is the progress so far and tomorrow once we get a hacksaw, we are going to cut the stem to size after measuring it properly as this is a precision job. After that, I will keep on putting the rest of the parts until I get to the wheels, which have been ordered, but have not arrived yet. I reckon it will be a very exciting day tomorrow as I get to open the plastic bags containing the parts and getting them onto the bike. Roll on tomorrow :)

Saturday, February 12, 2011

Mask away

Yesterday I started painting the orange and black accents on the bicycle frame. It took ages to mask the right areas and get it ready for the layering of the paint. After wrapping up the frame with masking tape and paper, it looked a bit like a Christmas gift. I must admit, I was being my usual anal self when putting the masking paper and covering the parts. But I knew that taking my time and being meticulous now would make the end result worth it. 


Today I was so excited to see how the masking had worked out that I went to work on the bicycle. It was like Christmas morning unwrapping the paper and masking tape off the frame. It turned out as good as I could have hoped. There were a couple of blemishes and rough spots, but overall not a bad job for my first frame painting job. I then put on a layer of clear coat onto it but was a bit disappointed with the nozzle on the spray can. It didn't diffuse the clear as evenly as the nozzle on the cans of Montana 94 paint. As a result, there were a couple of places on the frame where the clear coat dripped and this ended up messing it a bit. But it's not too big of a problem as it can be easily remedied with some wet sanding. I left the frame and forks to cure and will be back to have a look at the end result come Monday. Sadly I forgot to bring the camera with me but pictures will soon follow.

Thursday, February 10, 2011

Azul Perseo the first

Yesterday I spray painting the frame with the first coat of Azul Perseo colour and left it to dry overnight. When I went to the shop today, the result was quite good and I got onto putting another coat of paint onto the frame and also the forks which I left lastly to paint. I used the rest the can of paint today and managed to get two full coats on the frame and forks, which is was very good for me as the shop where I got the cans of Montana 94 from had run out of this particular colour and that they would only be getting it back in supply in about two to three weeks. This would have actually stop the progress of the bike build completely as I would not have been able to put any parts on the bicycle. In the end, the one can of spray paint was just enough and tomorrow I can start layering the Negro (Black) and Mandarina (Orange) colour onto the frame and forks in the way is similar to the Baum bicycle after getting some thin masking tape from Lenehans.
Here is the progress of the day so far.


Tuesday, February 8, 2011

Forks, more primer and a paint scheme

Yesterday Gareth gave me a set of forks for that fit the bicycle. I forgot to take a picture of it but here it is in all its glory.

Gareth is a total legend for hooking me up with these forks as I had tried pretty much every fork that was in the shop and none of them would fit on the bicycle frame as they were either too long or too short. But this one was just right like Goldilocks said. On top of that, these forks came with a pair of cantilever brakes which are superior to the original ones on the bike.
After cleaning up the forks and taking off the brakes, I sanded it down with two different grits of sandpaper until the lacquer was off. Then I used masking tape to tape off the parts that I didn't want primer on and got to spraying the forks with two layers of primer. It was a relatively easy and quick job as I had got lots of practice from the day before using the can of primer on the frame. The end result was a pair of forks with two coats of primer and no blemishes that I left to dry out on the line that we hang the frames.

Also today I put another coat of primer on the frame and the process was a bit easier than yesterday. Managed not to mess up and the frame looks ready to be painted. I left it to dry overnight on the hang line along with the other frames that have been painted in the shop.

Before I went to the shop today, I stopped by All City Records (http://shop.all-cityrecords.com/) in Temple Bar to pick up some spray paint for the bicycle. Montana-94 was recommended to me by the guys in Rothar as they use it regularly to paint bicycle frames. I ended up getting three cans for the colour scheme that I intend on putting onto the bike. I got Mandarina(Orange), Azul Perseo(Blue) and Negro(Black) and had a nice chat with the sales guy there who helped me get the right colours from the picture I had on the computer. I forgot to get his name and have to thank him for helping me out as I wouldn't have able to get the right colours had he not been there to lend me a hand.
The cans of Montana 94 are below and I think they look pretty cool.

The colour scheme that I have decided for the bicycle is based on the 1970's Porsche with the Gulf Oil livery. Hopefully, the end result of me painting the bike frame will be something like this:


I know it will not be exactly like that but I am hoping with a lot of work, it will turn out as close as I can get to the above picture without the Baum logo on the underside of the frame and the inside of the forks. Reckon with a lot of patience and masking tape, it will end up looking semi-decent. Bring on the first coat of paint tomorrow.

Monday, February 7, 2011

Here comes the paint

Today, I had a stab at painting the frame with the first layer of primer. Firstly I had to sand down the frame with some smooth sandpaper as over the last few days the frame picked up a bit of rust due to the dampness in the shop. After that, I cleaned the frame with a cloth and some thinner so that the primer would adhere properly to the frame. Next came shaking the can of primer for about one minute and then getting some gloves on so as not to end up with hands covered with grey paint. Gabrielle then showed me how to apply the paint onto the frame. Confident short bursts from the can of primer to avoid dribbling of the paint and keeping the motion fluid helped in getting a nice even coat of primer all over the frame. The whole process took about one hour as I was taking my time and had to wait for the paint to dry.I then got working on the underside of the frame as I had it on a box in the hallway, with the door propped open so that I didn't die(or get high) from the paint fumes.
In the end, I was quite pleased with the result as the primer was uniform all over the frame and there was only one slight imperfection which will be easily corrected with some sandpaper tomorrow before the next coat of primer is applied.


Tomorrow, I hope to go to All City Records in Temple Bar to buy the spray can paint (Montana 94) that I will be using to colour the frame. I have decided to go with a light blue paint with orange and black accents around the frame as an tribute to the Porsche 917 from the 1970's with the Gulf Oil livery. I have found a couple of examples on the net and it involves a lot of work but the end result is really cool from what I have seen. I know it will not be to the taste of a lot of people, but the colour scheme speaks to me as I am a big racing fan and I think that livery is quite iconic. Let's hope it turns out the way I image it :)

Friday, February 4, 2011

A naked frame and a logo

The first thing I did on Monday was to check up on how the Ammonia had worked on the handlebar issue over the weekend. It just hadn't made any difference to getting the forks looser from the frame and the only option was to cut the forks. Out came the angle grinder and within fifteen minutes Gareth had the forks out from the frame as I had never used such a power tool before and I didn't want to risk losing some fingers in the process.

The picture below shows the frame without the forks and handlebars.


Over the course of the day, I started stripping the paint off the frame with the help of the wire brush attachment to the grinder. 


The process was a slow one and it was physically demanding to get the whole frame stripped from the old paintjob. I am still recovering from muscle aches until today. But the end result was a beautiful steel frame, devoid of rust and the old paint and ready for a new lease of life. I was actually pretty proud about the work I had done to get rid of the rust and paint.

The picture below shows the end result after hours of intensive labour.


The highlight of the day was the fact that with the help of Gabriel, we were able to salvage the original Raleigh logo on the front of the frame by removing the metal pins that held it to the frame. This was only possible due to Gabriel's ingenuity as he used a nail as a drill bit for the drill after snapping the head off it. Armed with that, he managed to get rid of the three metal pins holding the logo in place and it was free. 


The old Raleigh logos are beautiful in my mind as they don't make them the same way anymore. The new ones are made from a thick plastic, glued onto the frame whereas the old ones were made out of metal and held with three pins to the frame. I am going to clean the logo to the best of my ability and put it on the frame, in its rightful place once the project is completed. That I think, will be the last thing to go on the bike but for now, the logo will live in my wallet.

Friday, January 28, 2011

Stripping the bike

Yesterday I brought the bike to Rothar (www.rothar.ie) to ask the guys there what could be salvaged and what parts I would need to get to make it become a touring bike. The guys there were really helpful and such a friendly bunch of chaps. They helped me take off all the parts off the bike and strip it down to the frame as I have decided to get it repainted as there were patches of rust on the frame. The forks were completely seized into the frame and even after leaving to soak overnight in WD40, it was still not moving.


The picture below is Gareth using an angle grinder to get rid of the bolts for the rear mudguard.


So today, we tried again to try to remove the stem again after soaking it in Ammonia. I was told that Ammonia should help as it attacks the rust. Don't ask me why or how, but the process is a very slow one and I spent most of the day pouring down Ammonia into the stem. The worse thing is the smell of the stuff. It smells like pee and once it gets onto you clothes or hands, its really hard to remove. Sadly, there was no immediate progress on removing the stem off the frame so far. In the process of trying to wiggle it out, the handlebars were bent out of shape and I reckon they will need to be replaced as well now.

The picture below is the frame stripped out of most of its components apart from the handlebars.

The picture below is of the handlebars, bent out of shape after using them as leverage to remove it from the stem.

So, the plan so far is to keep soaking it with Ammonia over the weekend and try again on Monday to see if the bars will then come off then. If they are still stuck, the available options then are either to cut it off and lose the forks or use heat from a blowtorch to heat up the frame and hope that after the metal cools down, it will be looser and will come off easier.
Fingers crossed I don't have to resort to cutting the stem as I would quite like to salvage the whole frame. Update to come on Monday when I get back to it.

Monday, January 24, 2011

Every project has a start

I had my beloved bicycle stolen this week from the ''secure'' car park with cctv cameras around. When I went to check up on it that day, it wasn't in the usual spot and I just knew it had been stolen as there had been a notice in the apartment's notice board that a couple of bikes were stolen over the weekend. People would say that I am normally a rational, level headed person who gets rarely upset when things go wrong. But after the bike was gone, I felt terrible and barely slept that night.The bicycle in question wasn't even an expensive racer or mountain bike but I adored it anyways as it was the way I had set it up for myself. It had started out as a Raleigh Urban 1 Hybrid but had been modified over the course of a year and a half by myself to become a touring bike which was my pride and joy. So, over the last few days, I had to get used to the fact that I wasn't going to see it ever again and that some random stranger had it in his possession from now on.

This is a picture of it:


In order to try to think in a positive way, I decided to do some research on whether to get another second hand bike or build one from scratch from parts to keep my mind busy.I knew that I wasn't afraid to get my hands dirty and that I would be able to restore/upgrade an existing bike with the help of a bike mechanic. Also, I had always wanted to build a bike up by myself as I am fond of DIY projects and was looking forward to a challenge.
At first, I thought I would just get a second hand bike and modify it to suit my needs. But after careful consideration of my finances, I realised that wasn't going to be possible due to being unemployed. Thankfully, I got very lucky this Sunday when Arthur offered me his old racing bicycle after hearing that my bike was stolen. The bicycle is an old Raleigh Modele 5  from 1977, that had been sitting in the shed for the past 2 years.

This is it in its current state:


I had seen the bike before in the shed and knew that it would suit my smallish size(5ft3'). Also, being made out of lug steel, I knew it would be a good starting point for a touring/racing bike.
So the plan is to salvage as much as possible of this bike and upgrade the drivetrain to modern standards such that it can cope with racing/touring.
Tomorrow I will have a proper look at it first thing in the morning and draft a plan of action then.
Will write an update then :)